OHDSI Databricks User Group
 OHDSI Databricks User Group Developer
How-tos:
Implementing OHDSI on Databricks Using Broadsea
Introduction
This guide will walk through the creation of a new OHDSI stack using Broadsea and using Databricks for the CDM on Windows. This guide assumes that you have Docker installed and a CDM instance you can point to in Databricks.Getting Started
Install Ponos
Ponos is a java application that can be used to automate certian tasks
associated with setting up a new OHDSI instance in databricks including
tasks such as creating an instance of the Eunomia CDM test data set in
Databricks and connecting an existing instance of the CDM in Databricks
to OHDSI tools.
Optional: Install Eunomia CDM
If you do not have an existing OHDSI CDM in Databricks you would like to use, you can install the Enomia CDM to use as a test case.
To create a test instance of the CDM in Databricks, Download and Install Ponos and the run the following:
run-ponos.bat db-demoThe code that creates the demo_cdm in Databricks can be found in the fhir-to-omop BuildDemoCdmInDatabricks class. The demo_cdm from the Broadsea distribution is created in Databricks using the Ponos tool. Data are sourced from .csv files included in the Ponos project that were created as a extract from a PostgreSql instance of the demo_cdm. This install includes the following:
- Upload of .csv files for the CDM to the Databricks FileStore
- Creation of the CDM database in Databricks using the DDL files from the Common Data Model (CDM) (version 5.3 is used).
- Population of the CDM (including vocabulary tables) from the uploaded .csv files
Shutdown PostgreSql
Before you get started, make sure you do not have a local instance of PostgreSql running as a service.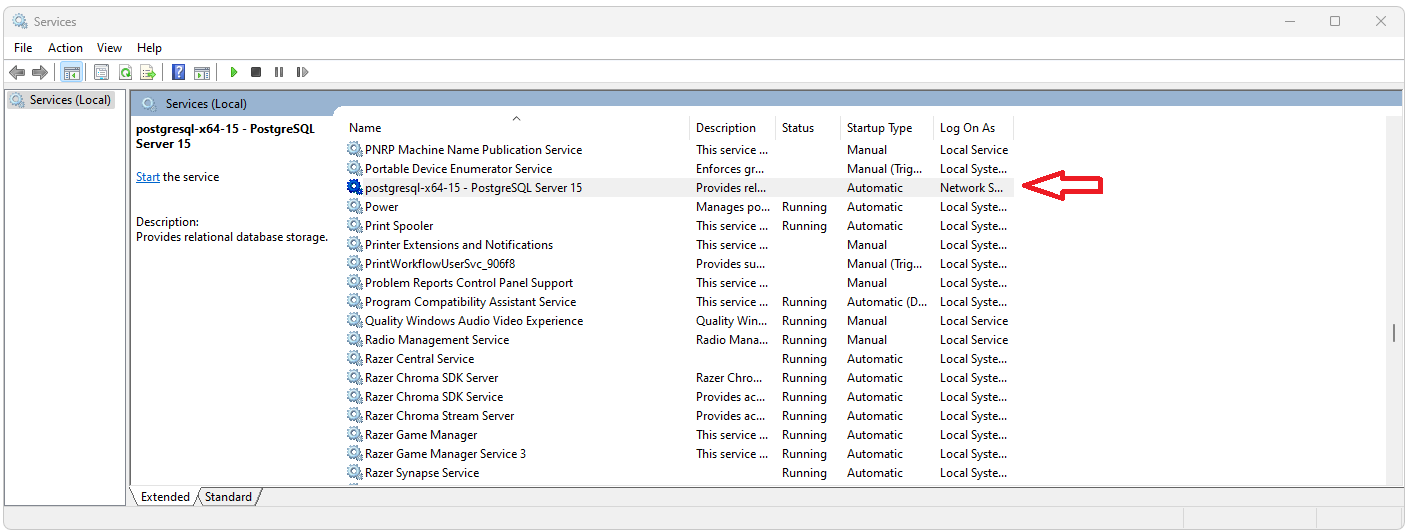
Start Docker
If you do not have Docker Desktop you can download and install it from https://www.docker.com/products/docker-desktop/. Start Docker Desktop from either the short cut if it was installed or from the Windows search menu.Clean Docker
To get started, it’s not a bad idea to clear out your Docker instance. The two scripts below can be run from PowerShell. The first script will delete all volumes, containers, and images from your Docker instance. The second script will show you if there are any volumes, containers, or images remaining in your Docker instance.clean-docker.sh
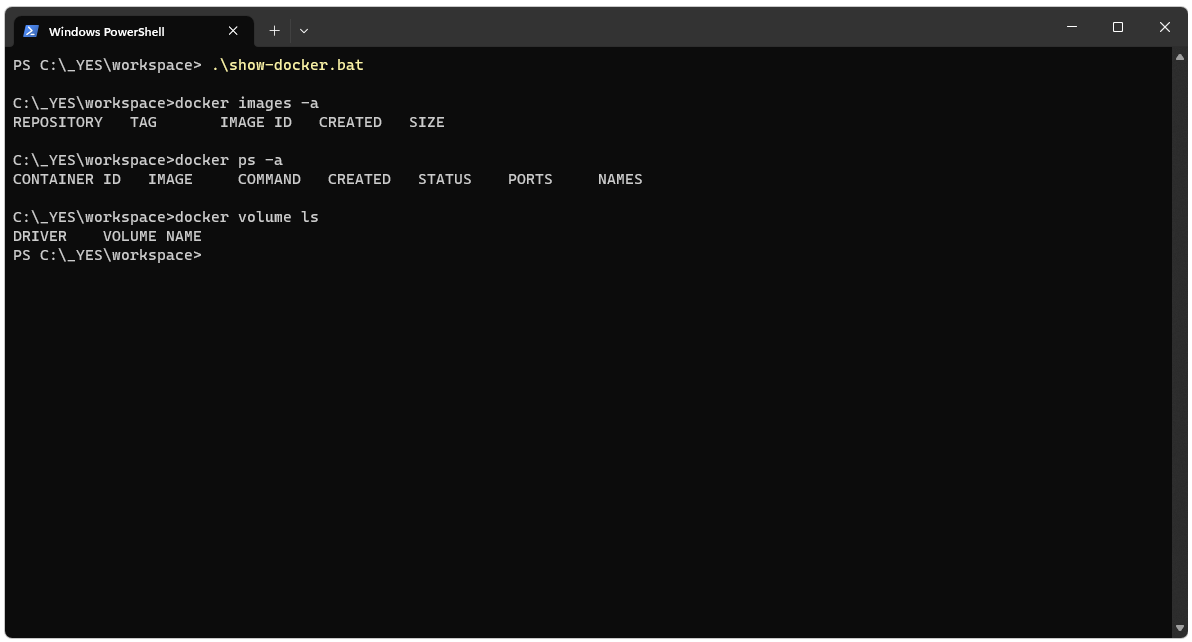
show-docker.bat
The clean script will launch a bash window and ask for comfimation that you really want to delete everything.
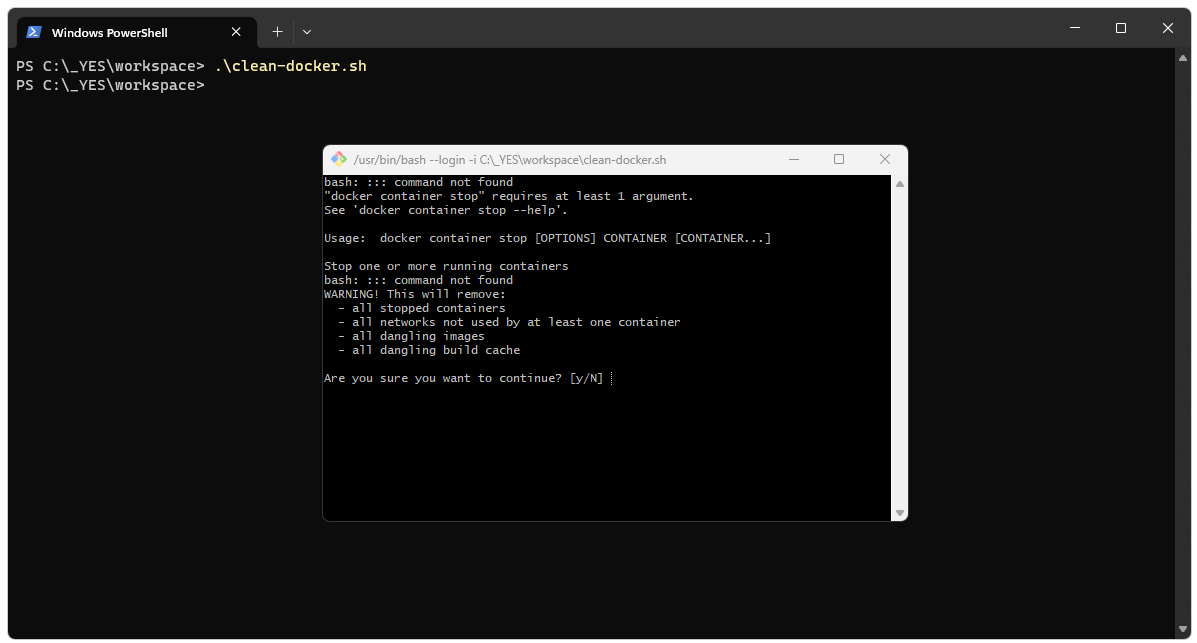
The show script can be used to confirm there’s nothing left on Docker.
Confirm Docker is Running
After Docker has been started and cleaned you should see something like what is shown below in Docker Desktop.Clone Broadsea from Github
Clone Broadsea using:git clone https://github.com/OHDSI/Broadsea
Update Broadsea
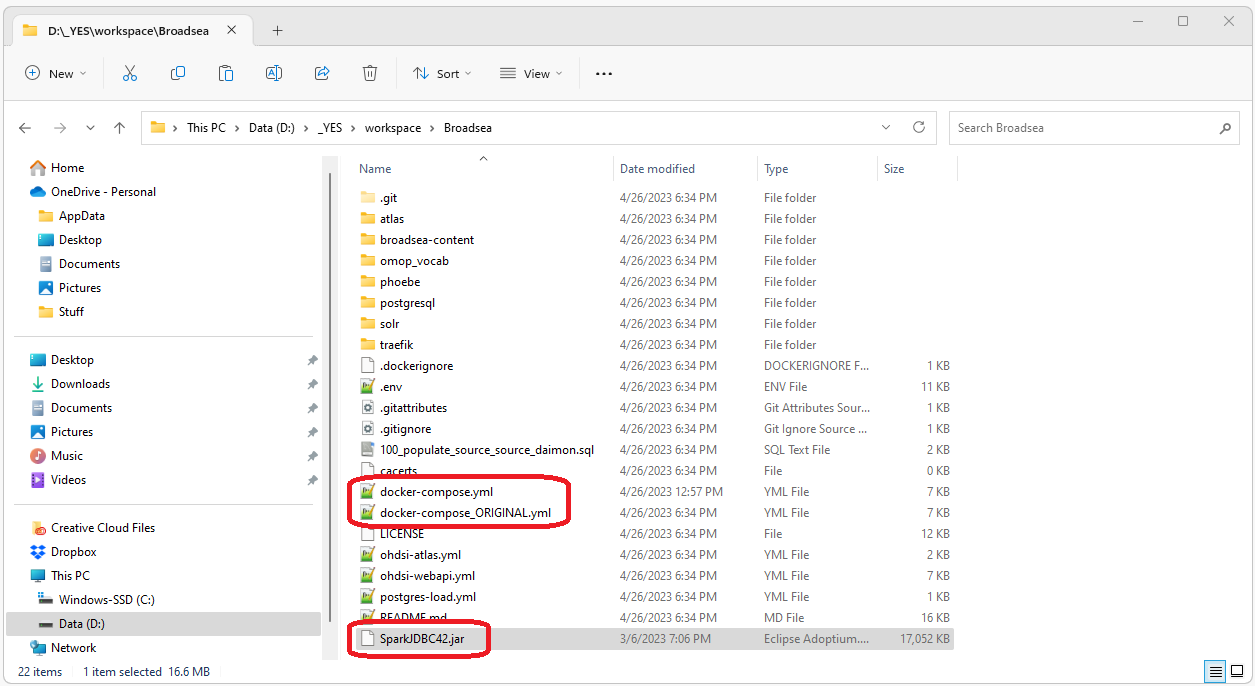
Next, copy the Spark JDBC Jar File and Update the docker-compose.yml file:Paste a copy of the spark JDBC driver you are using into your Broadsea directory (the directory that has the docker-compose.yml file) Replace the existing docker-compose.yml file with this docker-compose.yml file. (I usually backup the original as shown below). This new docker-compose.yml file simply adds the following lines to the ohdsi-webapi-from-image section.
    volumes:
      - ./SparkJDBC42.jar:/var/lib/ohdsi/webapi/WEB-INF/lib/SparkJDBC42.jar
The Spark JDBC driver and new docker-compose.yml file should
now be in the root directory of the Broadsea project as shown below.
Start Broadsea
Start Broadsea in the ususal way. Open a cmd prompt, navigate to the Broadsea directory and executedocker compose pull && docker-compose --profile default up -d
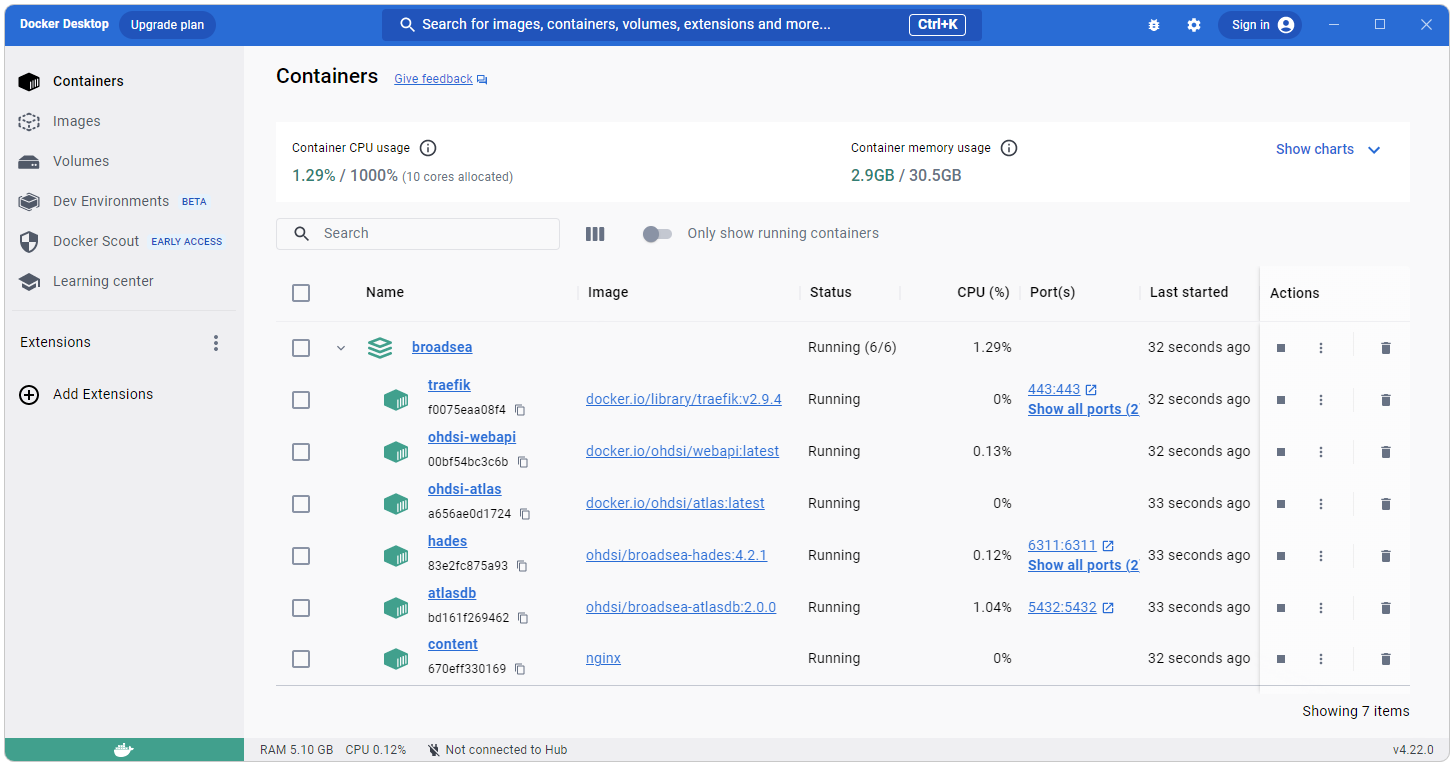
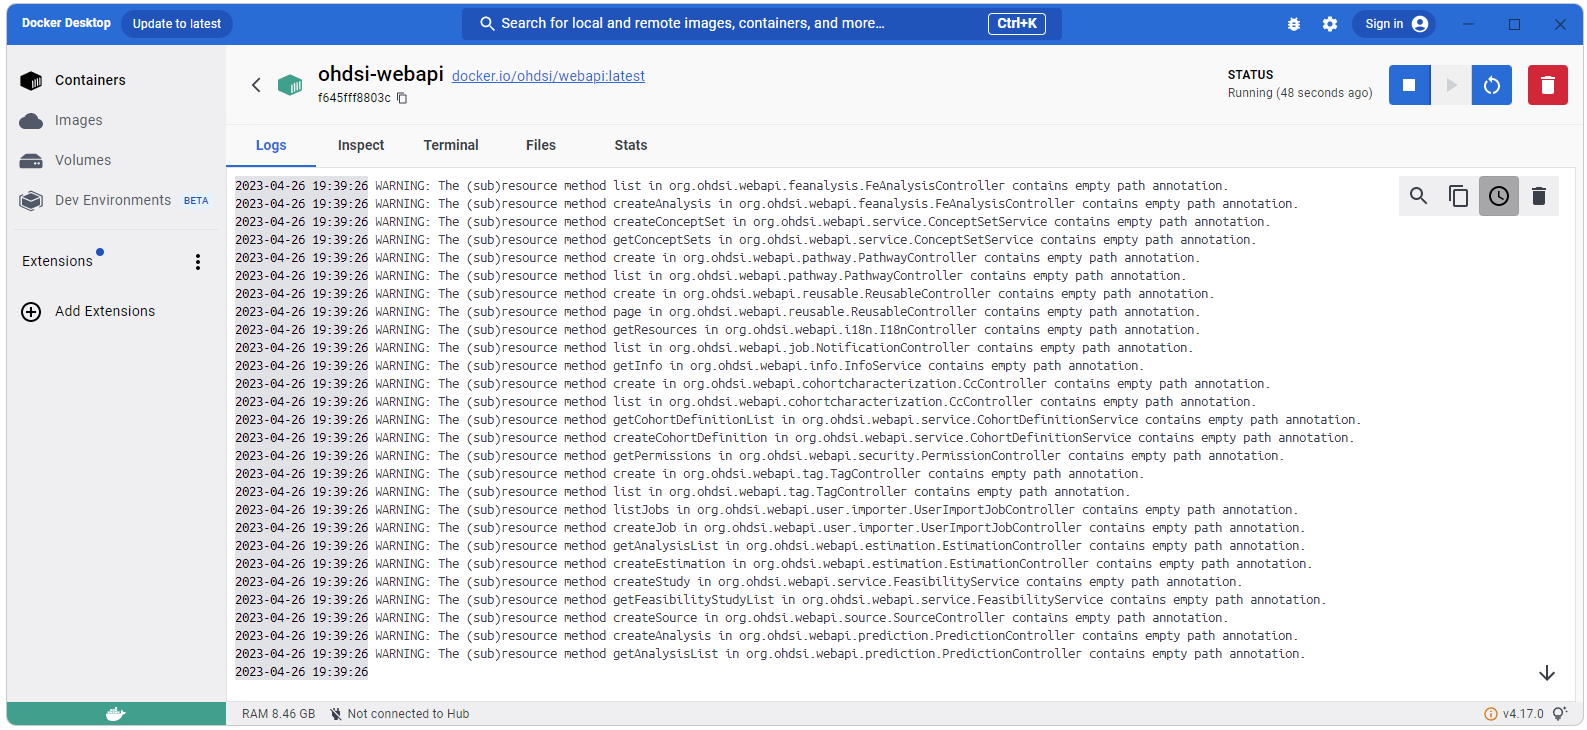
Confirm Broadsea
When Broadsea is running you should see something like what is shown
below in the Docker Desktop application.
Connect to OHDSI
The next step is to connect Your Databricks CDM to OHDSI. This can be done using Ponos bs-init.Install Ponos
If you have not already, install and configure Ponos. Instructions for downloading and installing Ponos can be found on the Ponos Install page.
Configure Parametes
After downloading and installing Ponos, edit the file found as ./auth/bs-databricks-public-demo.properties to use your parameters.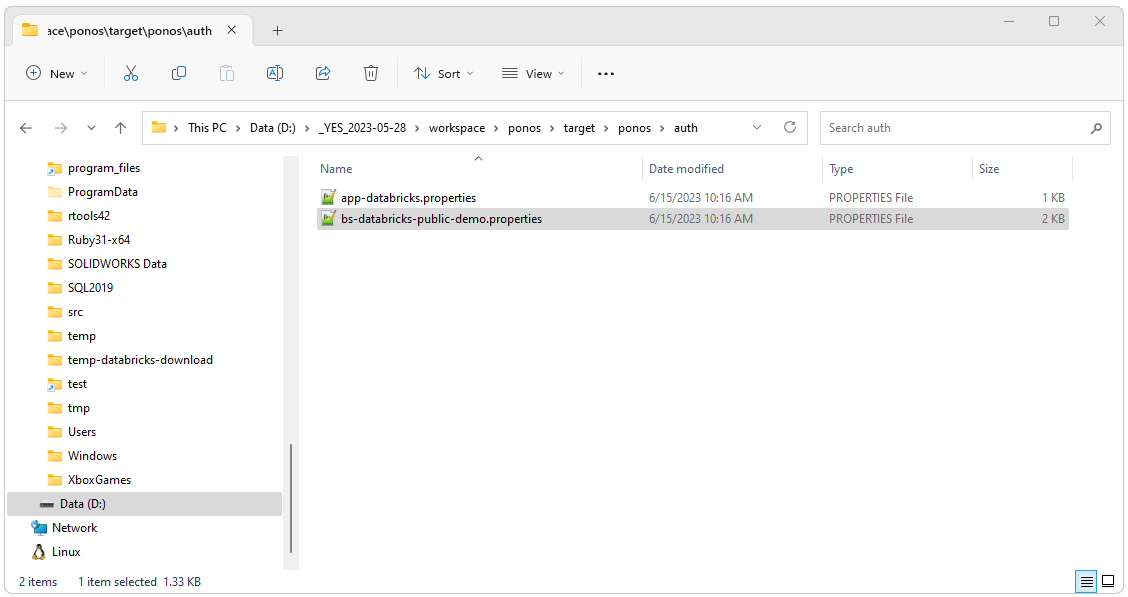
Use the following cmd from the location where you installed Ponos to connect your Databricks CDM to OHDSI.
run-ponos.bat bs-initThe source for this process is in fhir-to-omop tool suite OhdsiEnableExistingBroadseaOnDatabricksCdm class.
This process will do the following:
- Create the Achilles results database in Databricks
- Create the Achilles tables in Databricks
- Create the achilles_analysis table from the AchillesAnalysisDetails.csv file
- Run Achilles to populate the Achilles results tables
- Create the appropriate source and source_daimon records in the PostgreSql instance of webapi included with Broadsea (existing records for the key in the properties file will be overwritten).
Configure SSL and URL
The next step is to configure the JDBC URL (UseNativeQuery) and SSL for Databricks:Most Databricks instances use SSL by default. A Databricks instance that uses SSL will have “ssl=1;” as a parameter in the JDBC URL. To enable a connection that uses SSL, follow the instructions in the Notes on the Databricks JDBC URL, SSL, and UseNativeQuery page.
It should also be noted that the parameter “UseNativeQuery=1;” needs to be added to the url that is inserted into the webapi.source table. If you are using the Ponos application to create your OHDSI on Databricks instance, the Ponos application will add this to the URL if it is not already there. This is also described in the Notes on the Databricks JDBC URL, SSL, and UseNativeQuery page.
Restart Docker and Launch Atlas
Restart Docker:docker compose --profile default down docker compose pull && docker-compose --profile default up -d
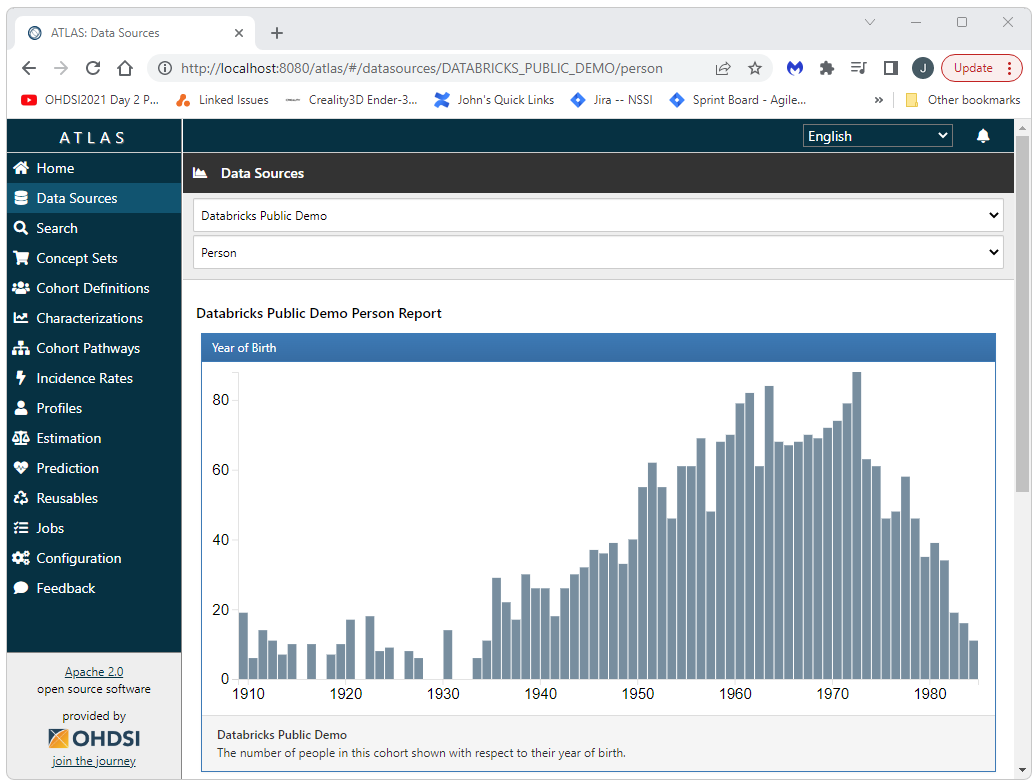
Open http://127.0.0.1/atlas in a browser and navigate to Data Sources. Select your data source (in this case “Databricks Demo” and then select a report, the Person report is shown in the screen shot below). When you do this you should not see any errors in the Docker output for webapi as shown below.
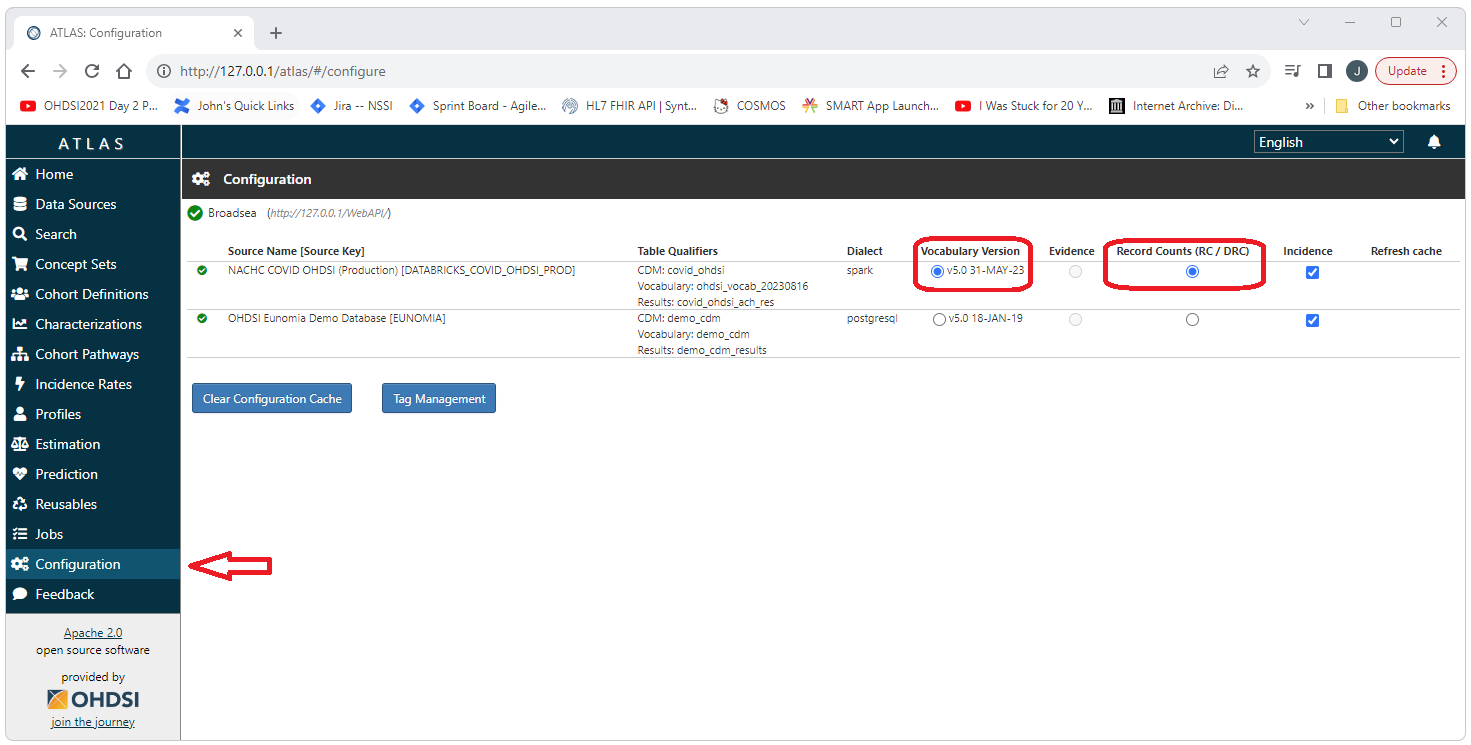
Configuration of Vocabularies
Atlas allows for the use of multiple data sources and each data source is generally associated with a vocabulary. Therefore, Atlas needs to know what vocabulary to use for certain operations such as concept searches and the creation of concept sets. At the very bottom of the left side menu there is a “Configuration” option. Select this option to indicate what vocabulary should be used.
This is important: If you skip this step you will have issues with
vocabulary operations and errors/exceptions that will not necessarily
immediately make you remember that this is causing the problem!!!
Select the Configuration option from the left side menu and then select the radio buttons for Vocabulary Version and Record Counts (RC/DRC).